Quickstart
This tutorial will guide you through the process of creating a local model card from Hugging Face and deploying the model card to the local server or a serverless GPU cloud.
Prerequisites
Install fedml, the serving library provided by TensorOpera AI, on your machine.
pip install fedml
Create a model from Hugging Face
Use fedml model create command to create a model card on your local machine. In this quick start tutorial, we will try
to deploy an EleutherAI/pythia-70m model from Hugging Face.
To give the model card a name, use -n option. To use a hugging face model, you will need to indicate the model source with -m option, and
use hf: as the prefix of the organization name and model name.
Currently we support importing text2text-generation model from Hugging Face, for other type of model, you need to create a custom model card. See the Create a Model Card tutorial for more details.
fedml model create -n hf_model -m hf:EleutherAI/pythia-70m
Deploy the model to the local machine
Use fedml model deploy command to deploy the model. Use -n to indicate the model card name.
Use --local option to deploy to the current machine.
fedml model deploy -n hf_model --local
The prerequisite dependencies will be automatically installed. After the local endpoint is started, use a curl command to test the inference server.
curl -XPOST localhost:2345/predict -d '{"text": "Hello"}'
You will see the output from the terminal with the response of that model.
"{'generated_text': '...'}"
Deploy the model to a Serverless GPU Cloud
Before you start, you will need to create an account on TensorOpera AI.
Use fedml model push to push the model card to TensorOpera AI Cloud. Replace $api_key with your own API key. The API Key can be found from the profile page.
fedml model push -n hf_model -k $api_key
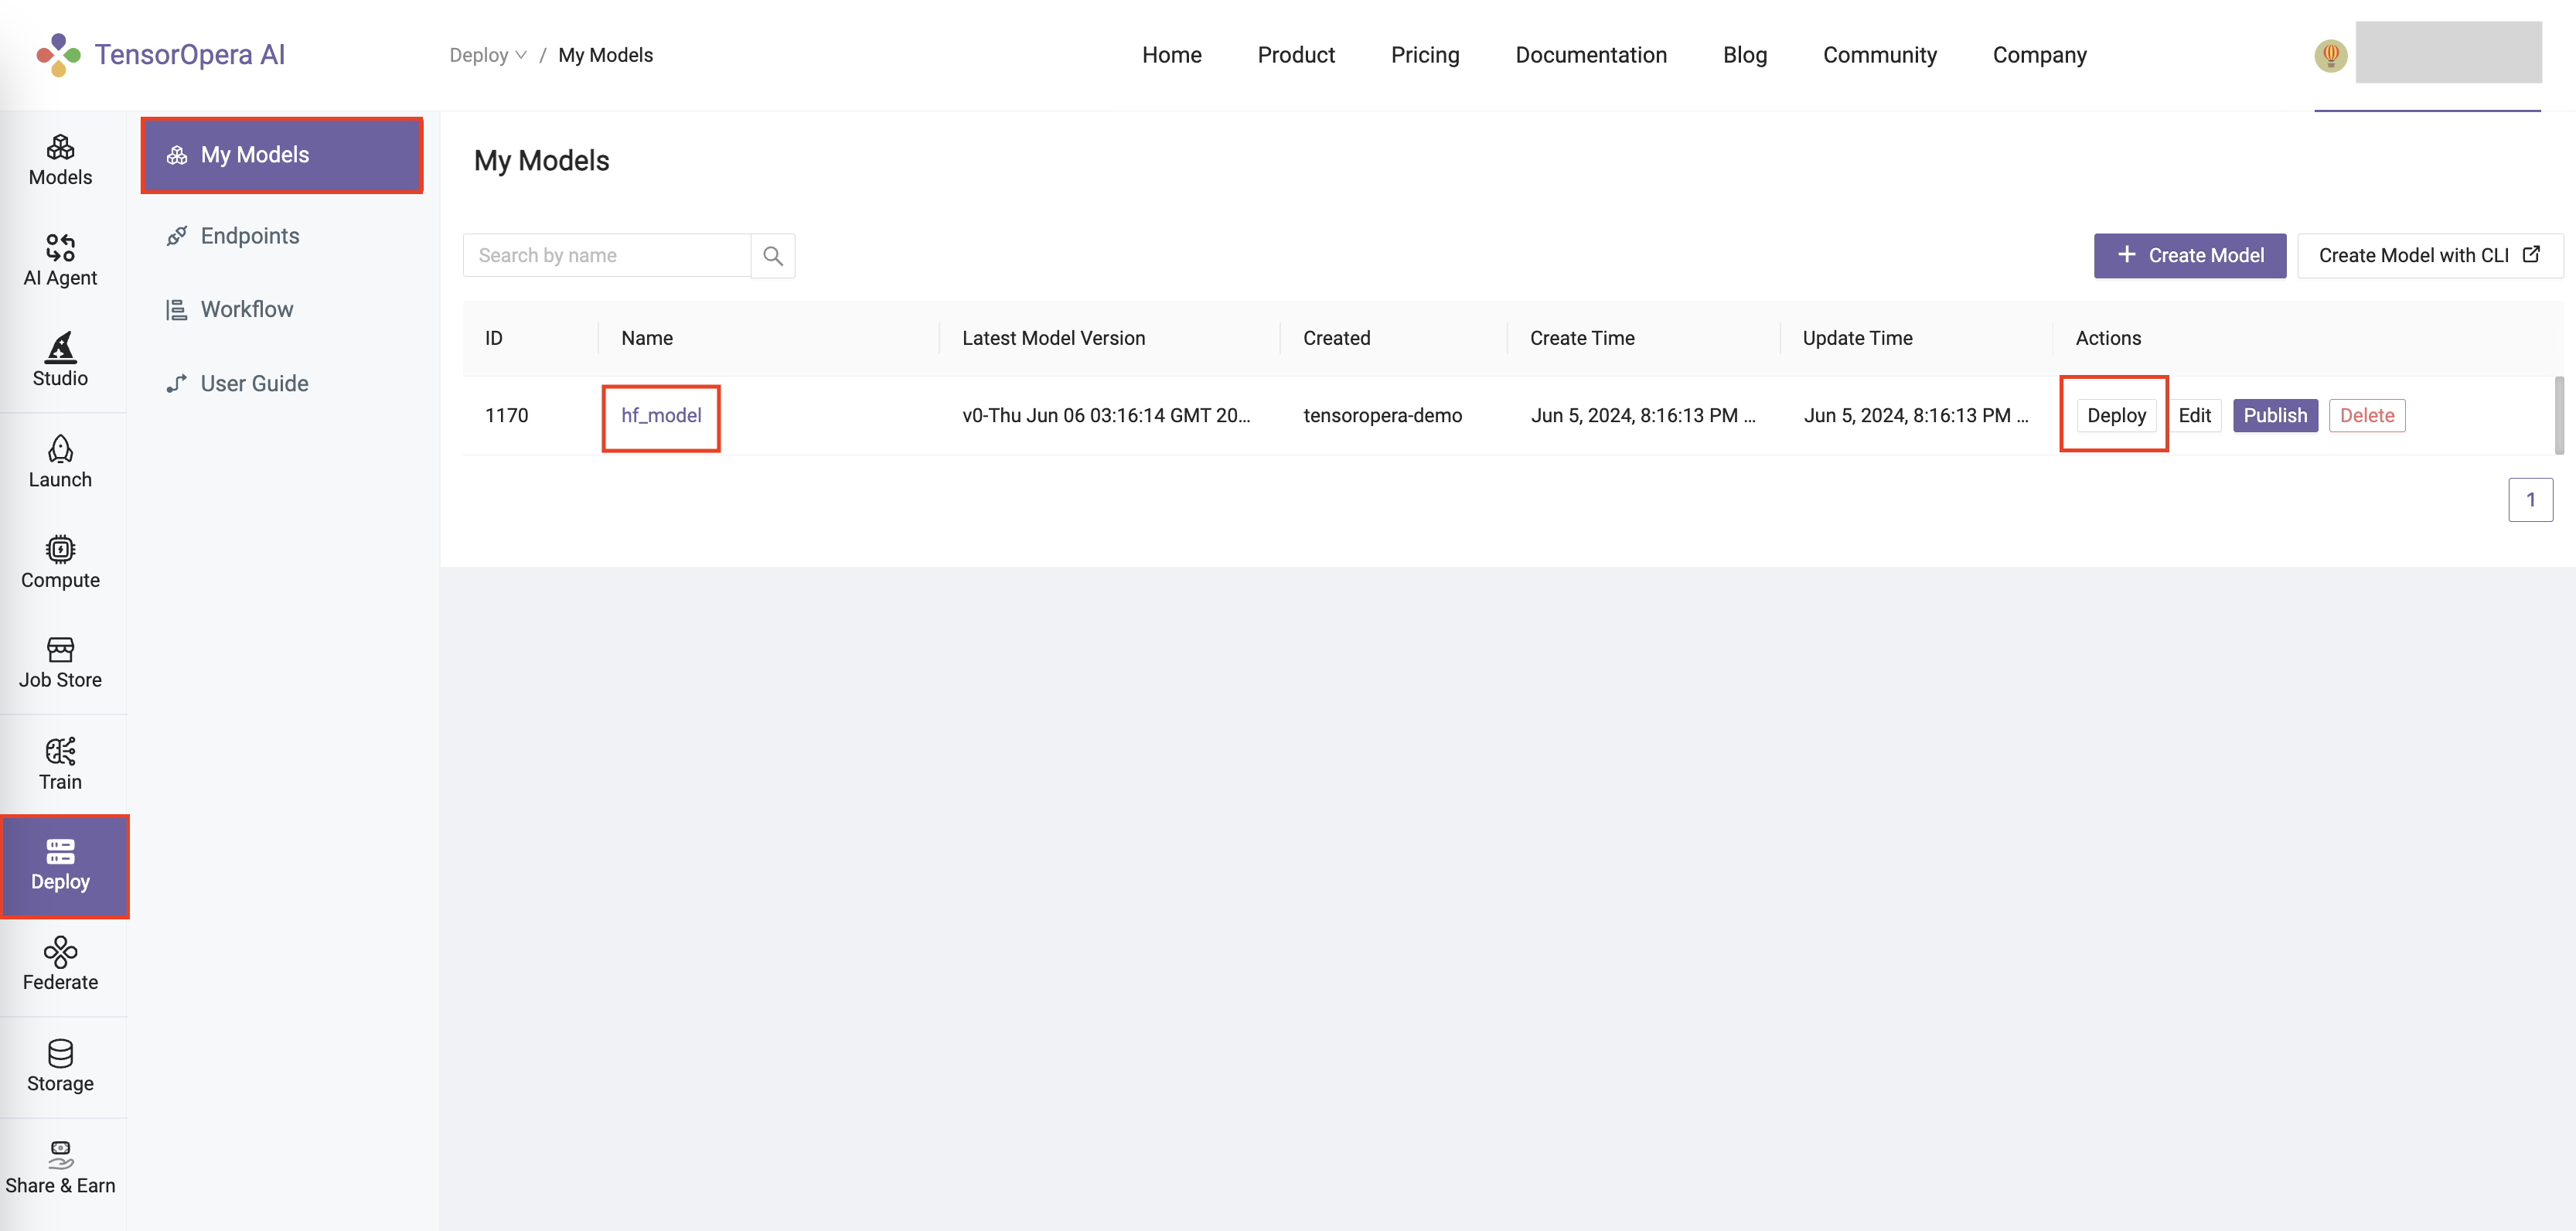
After you push the model card to TensorOpera AI Cloud, you can deploy the model by going to the
Deploy -> My Models tab on the TensorOpera AI Platform dashboard.
Click the Deploy button to deploy the model.
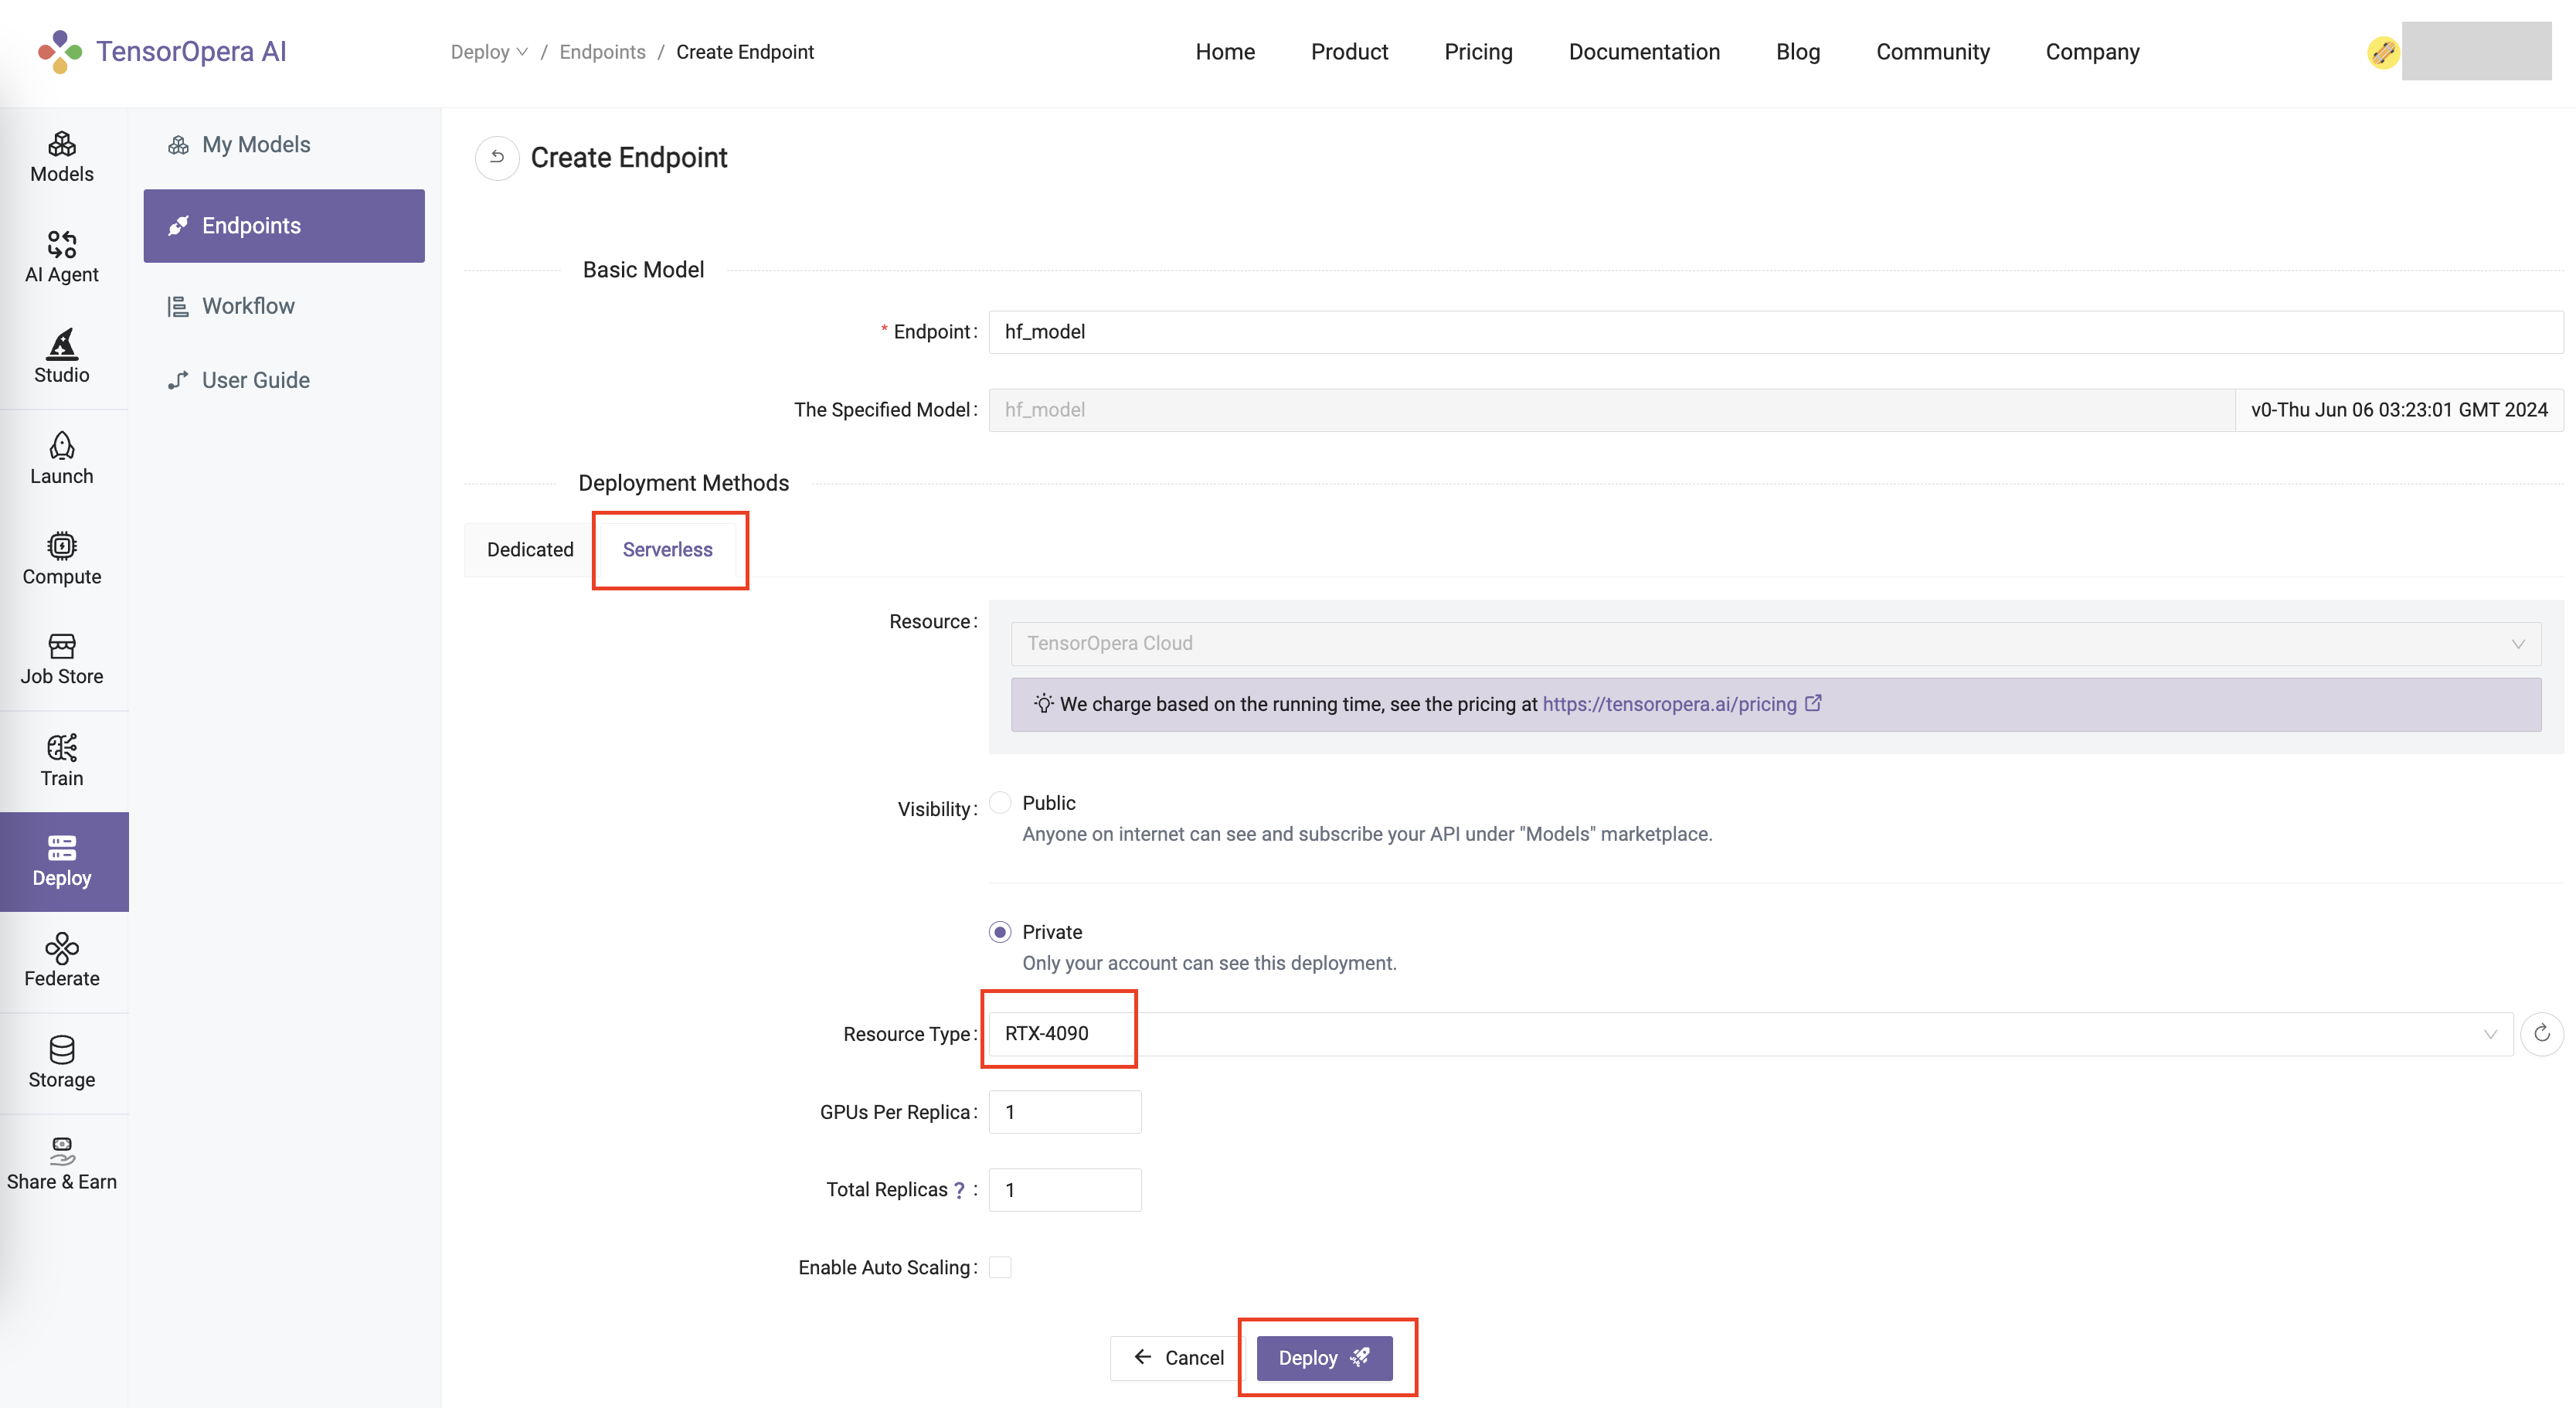
For this quick start tutorial, we can select the Serverless RTX-4090 option and click the Deploy button.
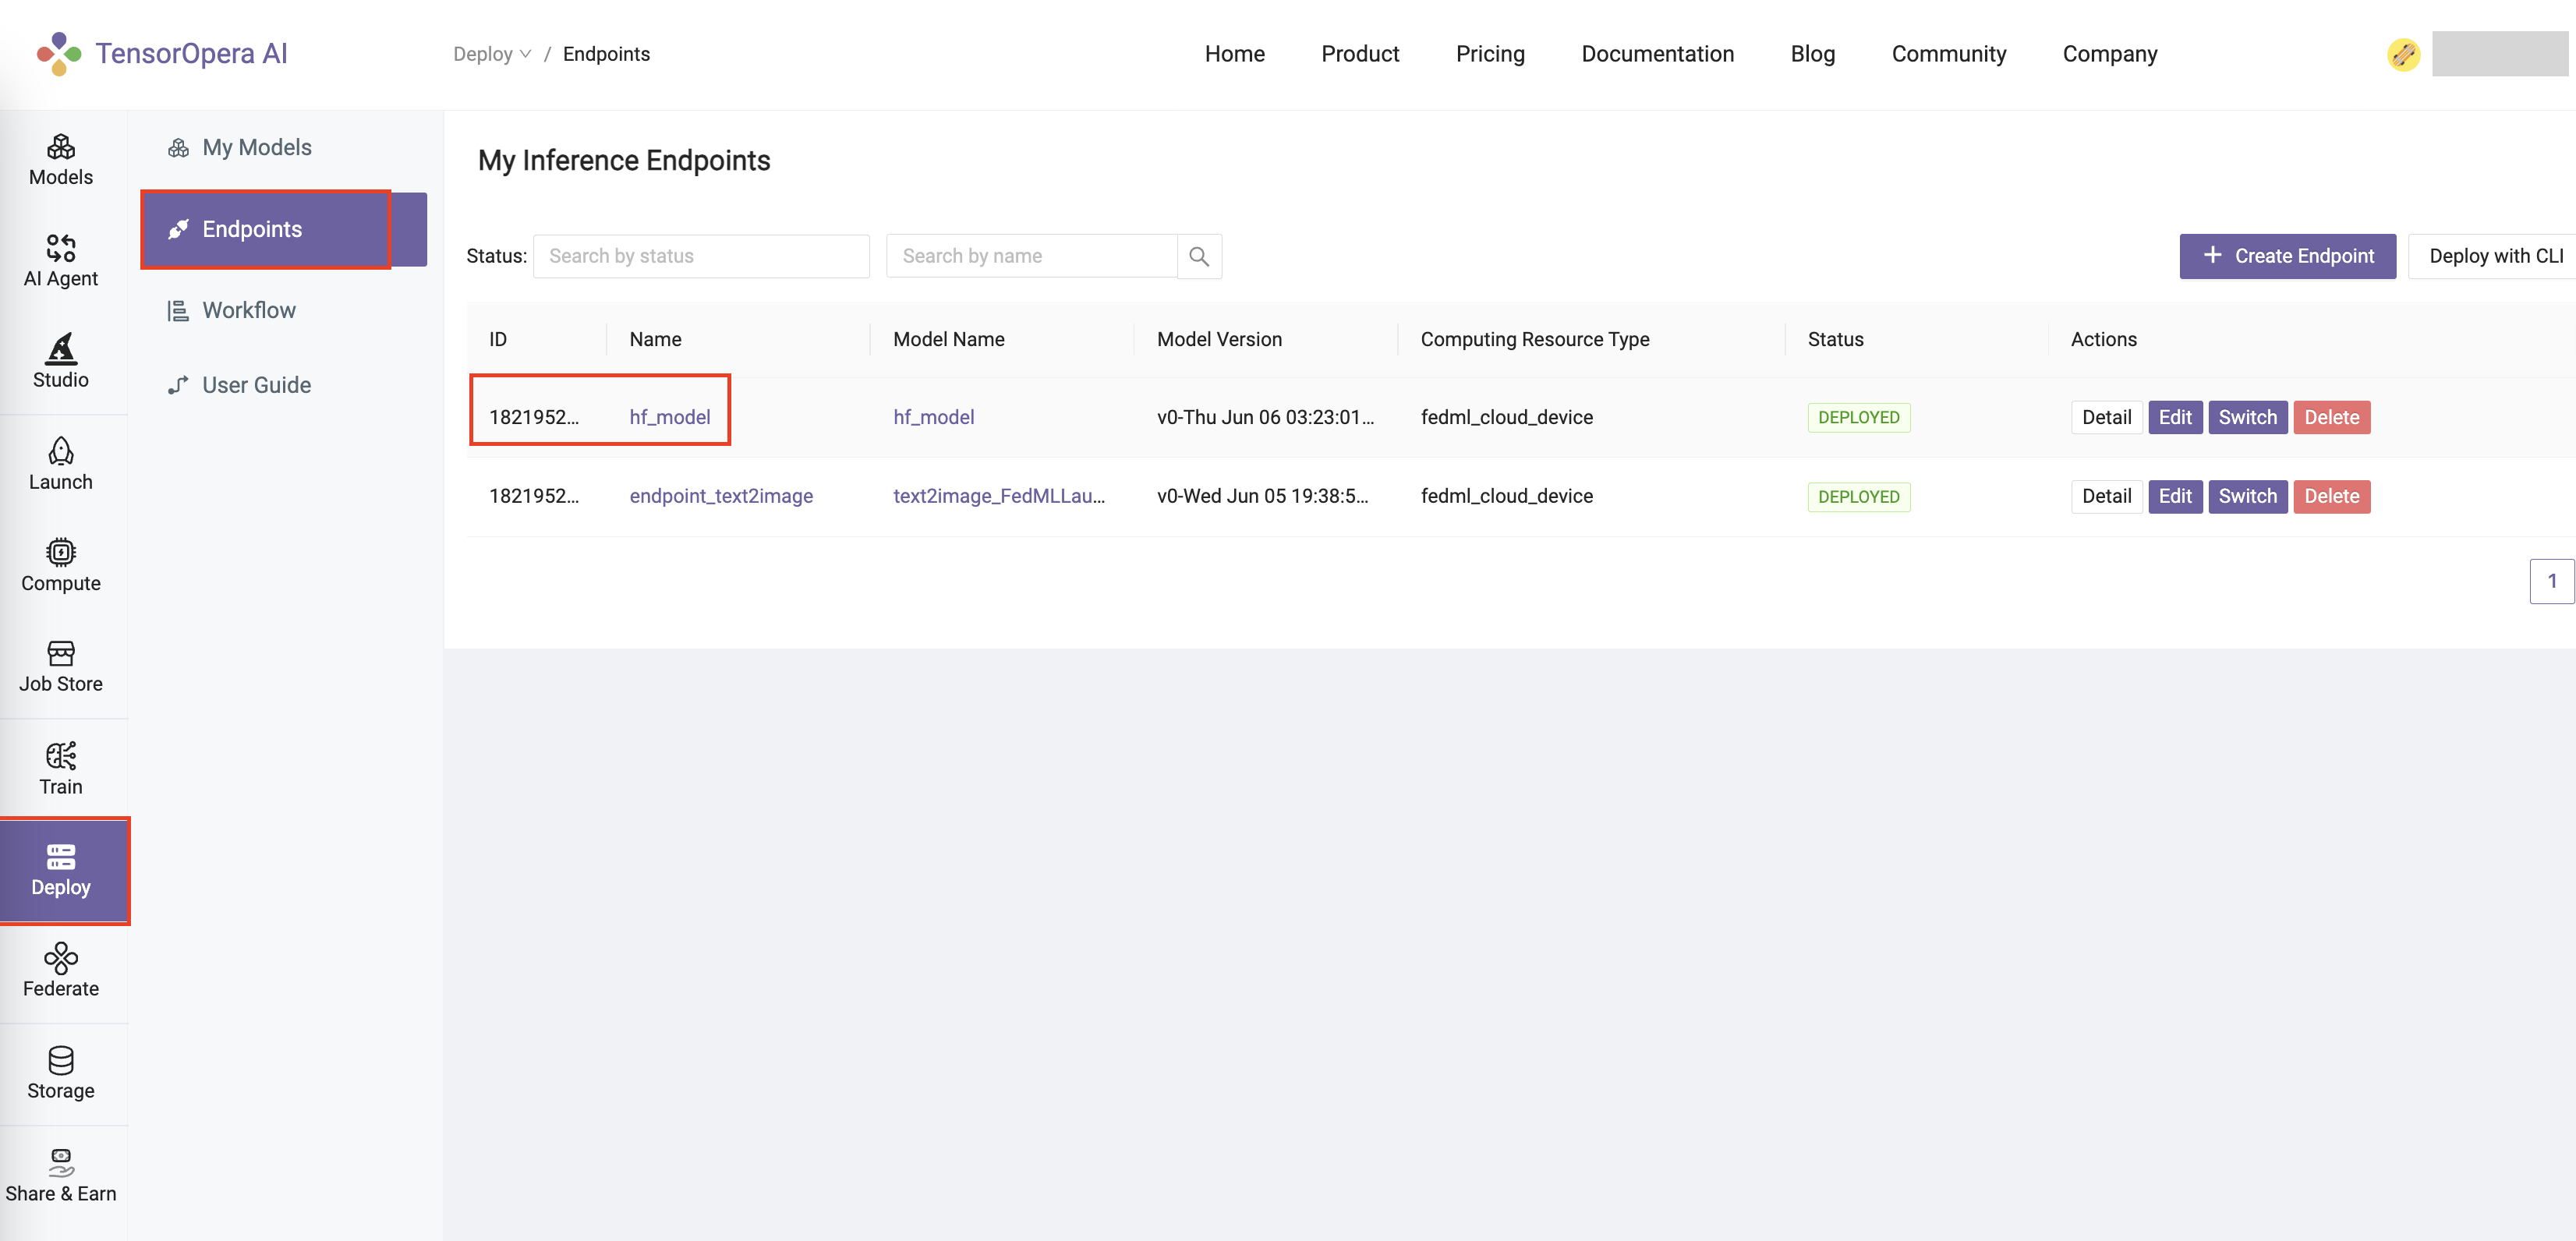
After few minutes, the model will be deployed to the serverless GPU cloud. You can find the deployment details in the Deploy -> Endpoints tab in the TensorOpera AI Cloud dashboard.
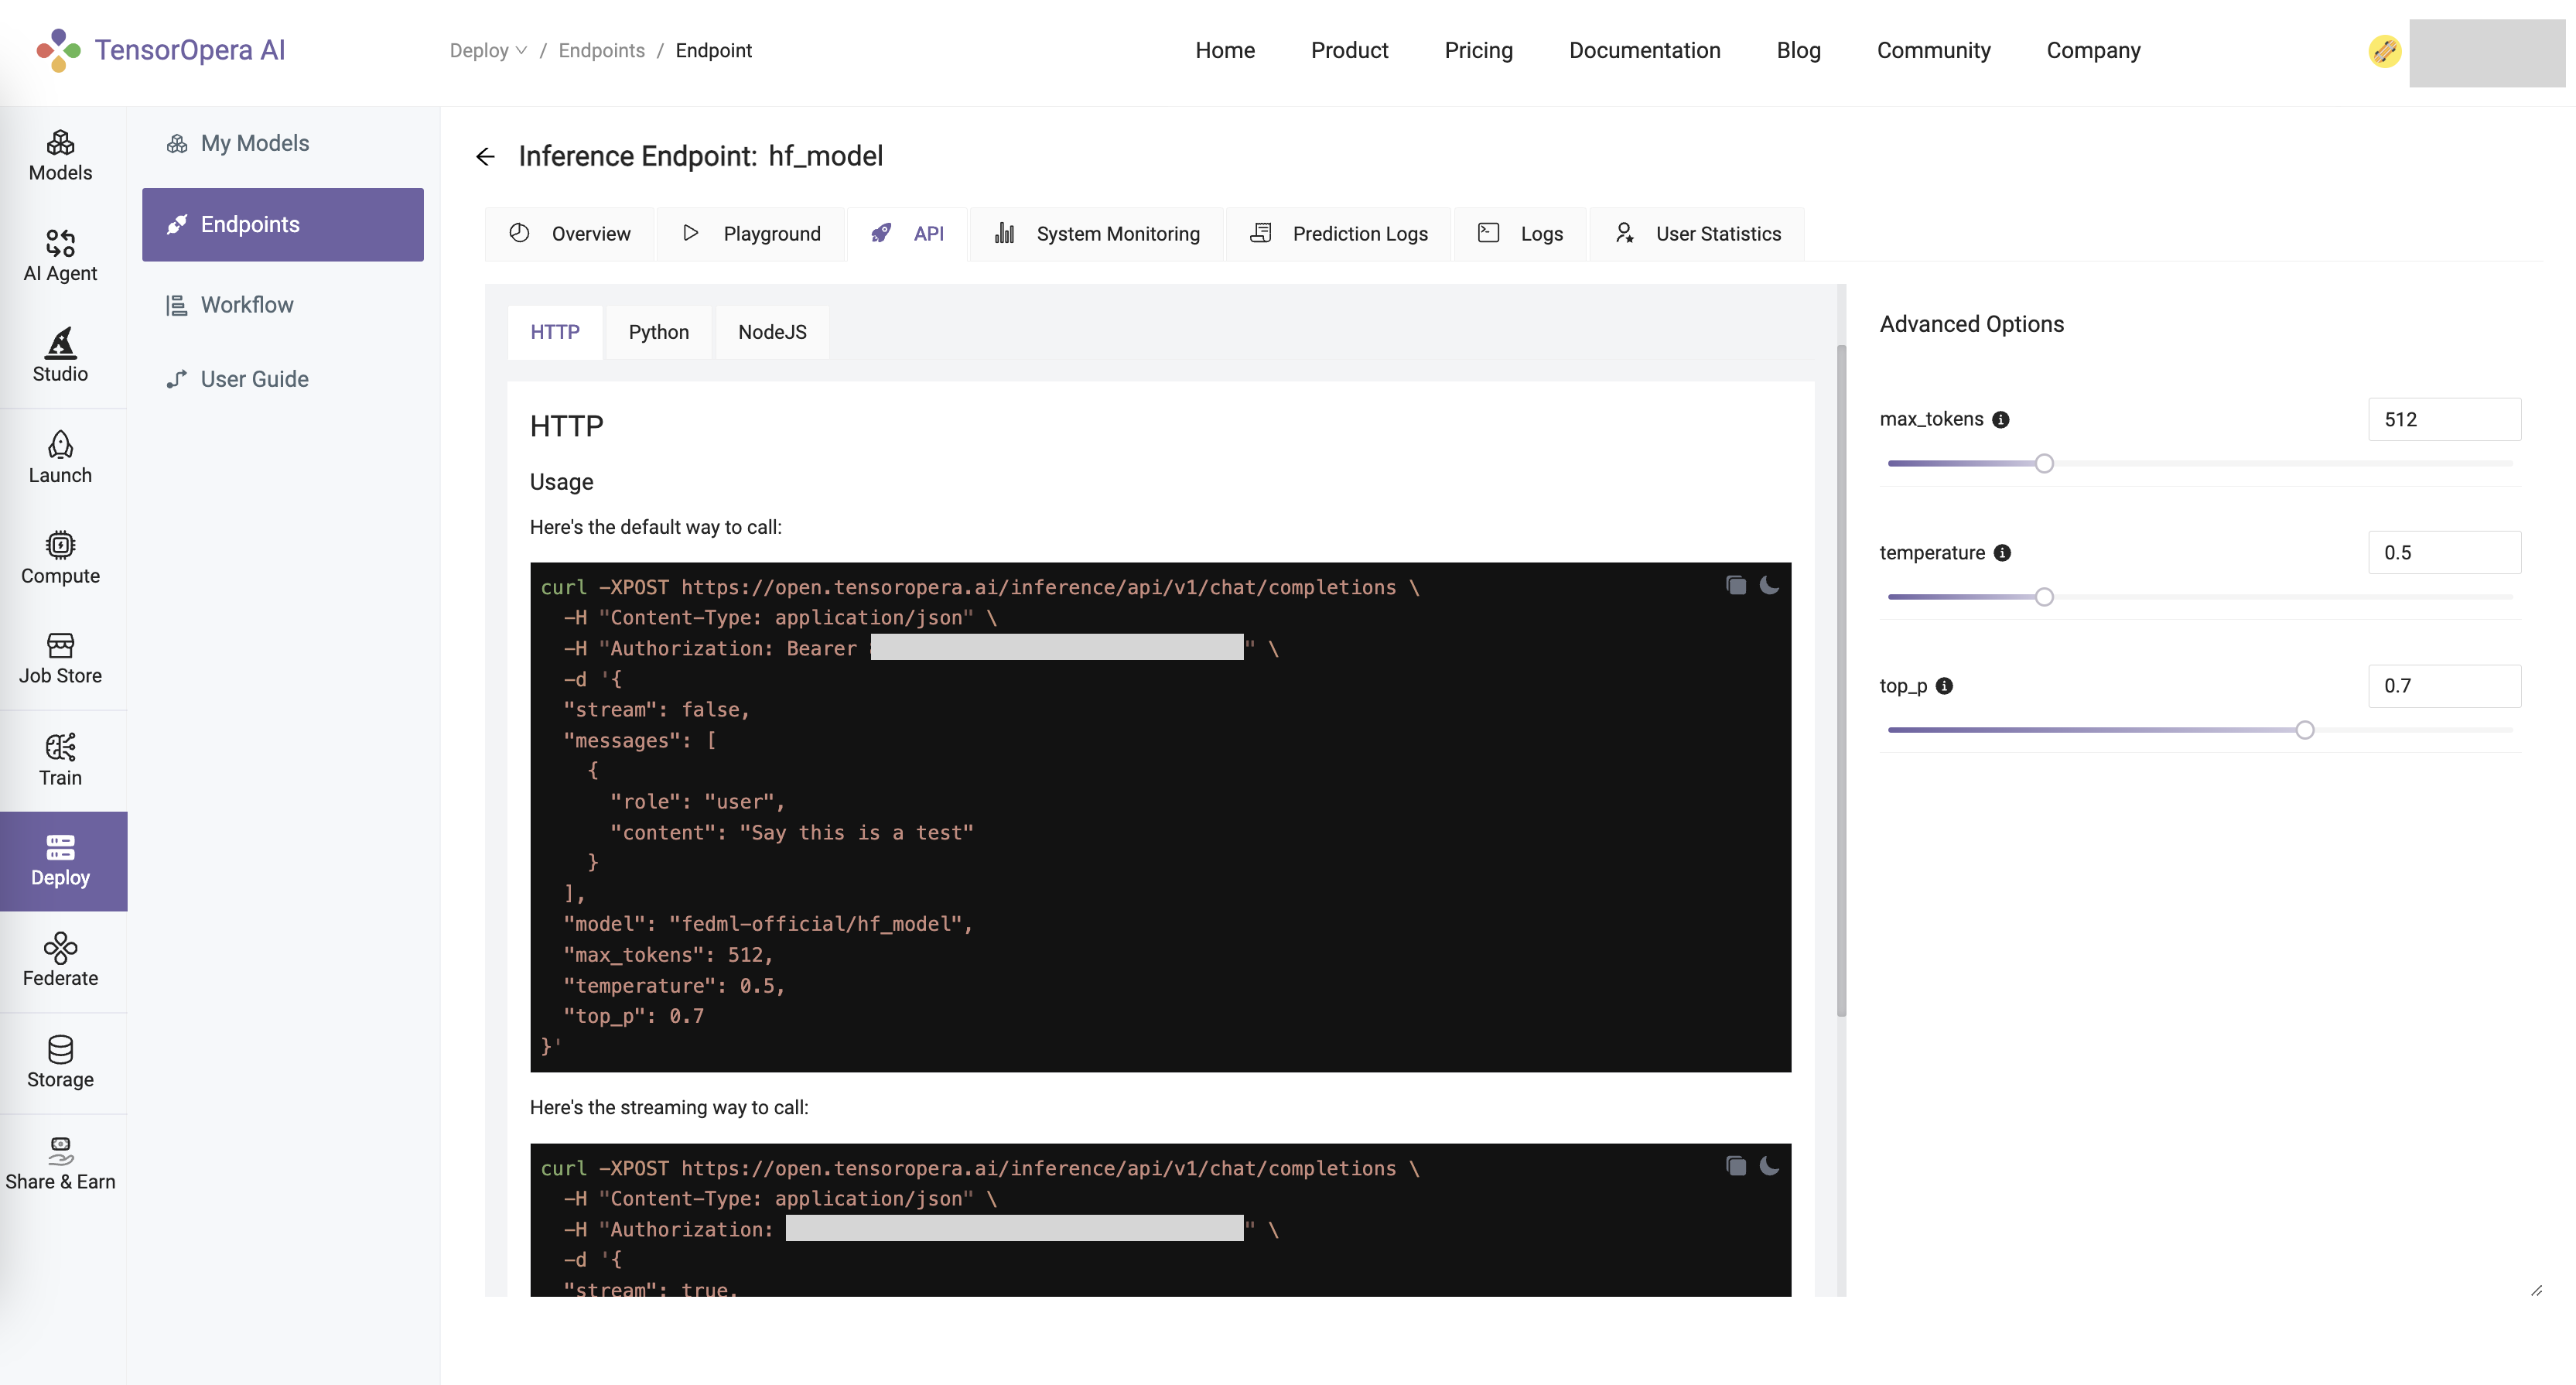
You may interact with the deployed model by clicking the Playground tab in the deployment details page, or using the curl / Python / NodeJS command under the API tab.
What's next?
To create and serve your own model card, follow the next tutorial Create a Model Card.